How to Root BlueStacks(ver 0.7.x.y) On 09:04 By Nandit Sainiandroid emulator, bluestacks, bluestacks root, Bluestacks RootEZ.exe, Root, Root Bluestacks, Root Bluestacks 2014, Root Checker Basic Yeah you read it right guys , you can root BlueStacks too.This is because BlueStacks as you know is an Android Emulator and has a Android OS running on it and like any other Android Mobile, BlueStacks can also be rooted.Its very easy to root BlueStacks just follow the following steps.
Requirements:-
- Download a Zip file from Here
Steps to follow:-
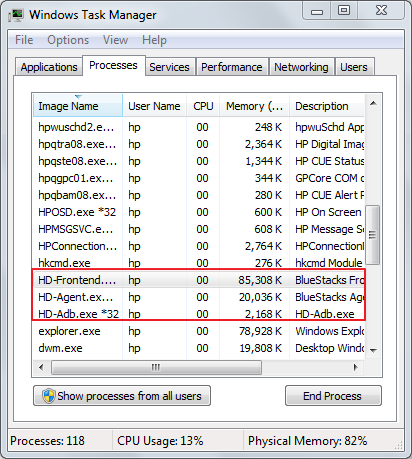
- First of all we need to End all processes related to BlueStacks App Player.In the image below all the processes in the red box are needed to be closed by Selecting the Processes and then clicking on End Process.
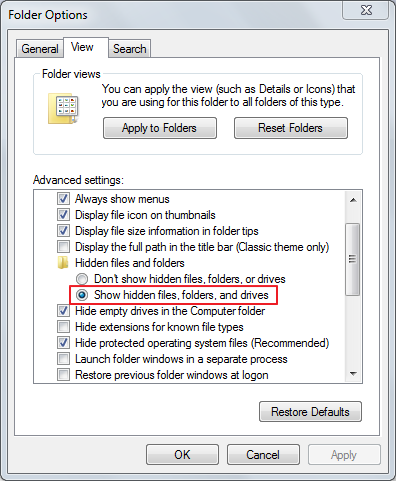
- After killing the processes,you have to change the folder options,for that you have to Open Computer then go to Organize and then click on Folder and search options. In the dialogue box select the radio button saying Show hidden files,folders and drives and click on OK.
- Then go to path C:ProgramDataBlueStacksAndroid and backup the Root.fs file as we are going to replace this file later.

- Now, extract the zip file you downloaded from the link given above .Then open the extracted folder and then double click on the Bluestacks RootEZ.exe. It will ask for Administrative Rights so Click on OK.
Then in the opened window firstly click on Automatic Detect from Installed BlueStacks button or you can browse if you had installed BlueStacks in other location.
After that Check the checkbox saying “Enlarge System (Root.fs) Size to 400MB” as shown and then click on I’m Ready for Step 1 button.
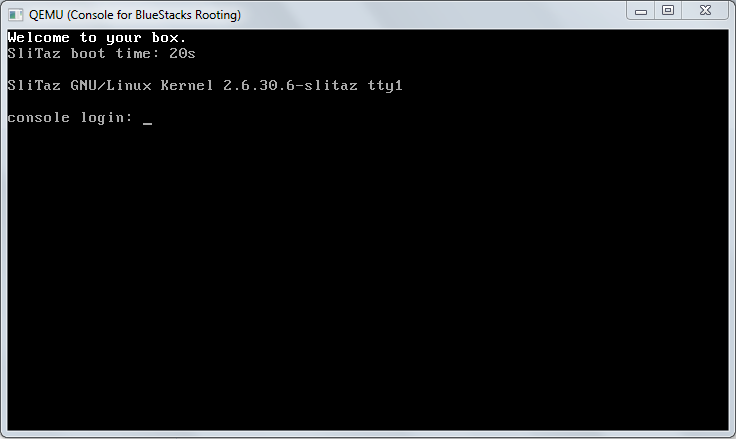
- Now , wait for the step 1 to complete.Only when you see a black window saying console login, you will click on the Go for Step 2 button but yeah don’t close this Commmand Prompt type window shown below before clicking on the button for the next step, that window will automatically close when step 2 has been completed.
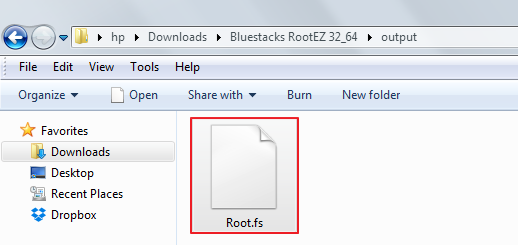
- Then go to the output folder which is in the same folder from where you opened the Bluestacks RootEZ.exe file and then copy Root.fs file
- Now, again to C:ProgramDataBlueStacksAndroid path and then replace the Root.fs file there, with the file you just copied in the above step.
That’s it your BlueStacks is now Rooted.
Steps to confirm the Rooting
- Launch BlueStacks
- Install an application named Root Checker Basic in the BlueStacks.
Note:- If you don’t know how to install an Application on BlueStacks check out the post below:-
How To Install BlueStacks Android Emulator - After installing the Application open it.The application must ask for the Root Permission as shown below.
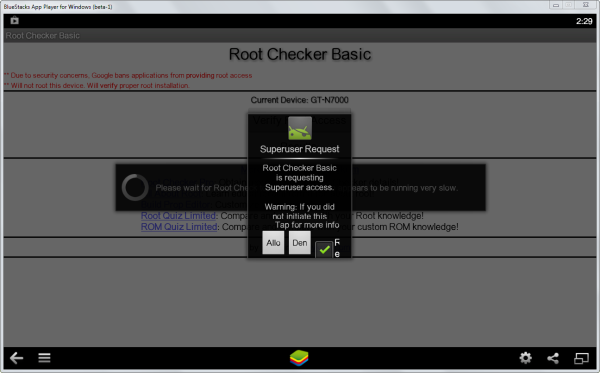
- Click on Allow.
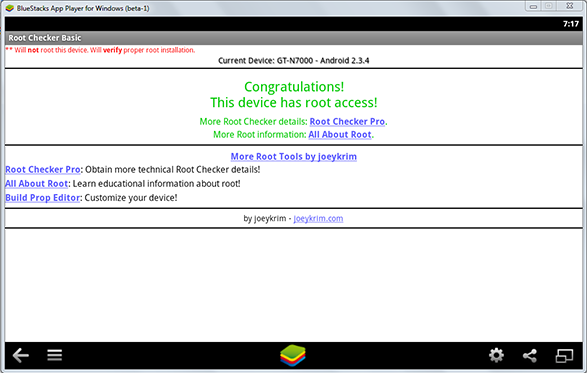
NOTE: This is for education purpose only.